Monday, November 22, 2010

Nectarine Crepes

Oye, I have completely forgotten how much time going to school full-time and working takes. Sure, I still have time to cook and take photos, but to take time out and write about what's important to me seems to have gone out the window. Any free time I have now is dedicated to friends, boyfriend, or family.

Boy, do I look yums.


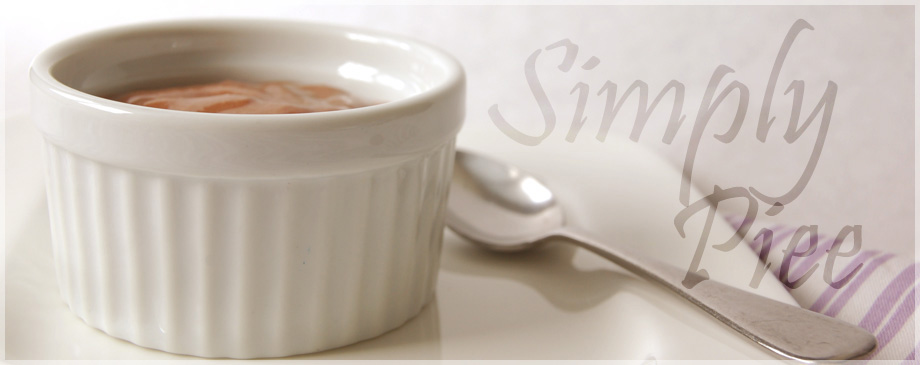
Today, I learned that yogurt, brown sugar, and fruits used as a garnish is a bad idea. First, yogurt melts underweight and heat and does not maintain it's shape like ice cream. My nice scoop of yogurt melted into a mess when I topped it with a pretty nectarine (fail.) Second, brown sugar dissolves onto of yogurt. It looked cute sprinkled on top of the crepe, but couple minutes later, it melted into a gooey puddle. Seriously...way to ruin a perfect looking crepe.

I'm melting....

Disaster at its finest.

What happened was that I decided to make my middle sister nectarine crepes tonight as a goodbye sweet treat before she left for college the next morning. The nectarines were sauteed with brown sugar and cinnamon until it became syrupy. I made crepes as well. Both components turned out perfect. Since we had thick n' creamy vanilla yogurt in the fridge, I decided to garnish the crepe with it. It looked pretty and it tasted yums. I garnished an extra crepe for photos and left it alone for a couple of minutes to cook another crepe. When I came back to the model, it became a melted ugly mess. Waahhh. So i forced myself to finish eating that one and I made another less perfect crepe. Boo. Oh well. At least I have pretty pictures, right?

EAT ME.


Basic Crepe Recipe
Adapted from a recipe I copied from an unknown book years ago

1 egg
dash of salt
1/2 cup flour
3/4 cup milk
1 TBSP sugar
1/2 TBSP cooking oil
1 tsp vanilla extract

Directions
  1. Combine all ingredients in a large bowl and mix until smooth.
  2. Each pancake is approximately 2 TBSPs of batter. Cook one side until brown, flip, and cook otherside until colored.

Sauteed Nectarines


2.5 TBSP brown sugar
3 small yellow nectarines, sliced
Cinnamon, to taste

Directions
Pour brown sugar in pan. When it begins to melt, toss in the nectarines. Stir it occasionally and when the nectarines become tender and sauce has thicken, turn off the heat and add the cinnamon.

Assembly
  1. Place crepe on plate.
  2. Scoop some nectarines.
  3. Fold crepe edges in so it becomes a roll. (Seam facing down)
  4. Top with a dollop of thick n' creamy yogurt, whip cream, or vanilla ice cream. Sprinkle some brown sugar on top.
  5. Enjoy~

Thursday, November 18, 2010

Maintaining Friendship and Caramelized Potatoes

One of my close friends from college moved to China about 1.5 years ago; it's been difficult trying to keep in touch. We emailed frequently in the beginning, but it eventually tapered off to an email response every couple days to weeks. I constantly reminded myself to reply to her emails, but something always came up so I told myself that I would do it the next day. Of course, I don't reply the next day and I continued to procrastinate. By the time I finally wrote a response, I had forgotten what I wanted to tell her.

About a month ago, I tried a new method of keeping in touch with her. I started sending her a pic-a-day through my mobile phone to her email. A picture is simple and doesn't require much writing and if i wanted to share some thoughts with her, I could include it in the picture email. I've been enjoying it so far, because it doesn't mentally exhaust me and I can keep up with it. It motivates me to appreciate the little things in life, because I have to find something to show her. It lets her know that I care and miss her and how much I want to spend an afternoon or night with her, chatting and being silly. I can't wait to save up money and fly out there to see her in the future.

P.S. My daily photos were such a hit that I reached my monthly text message quota two weeks ago. Oops.I can start sending her pictures again on Saturday when my plan resets. Whoo~


This recipe was inspired by a Korean banchan I had awhile back with my family. I made it for JSB and she enjoyed it.

Oven Baked Caramelized Potatoes

Ingredients
  • 1 1/2 cups of red potatoes
  • 1 TBSP (or more) canola oil
  • 2 TBSP (or more) sugar
  • sea salt

Directions
  1. Wash, peel, and cut potatoes into 1/2 to 3/4 inch chunks.
  2. Preheat oven to 400°F.
  3. Boil potatoes for 8 to 12 minutes until just barely cooked. (Knife has difficulty going through potato)
  4. Dry potatoes with paper towel and drizzle with olive oil until lightly coated. Line baking sheet with foil/parchment paper. Spread potatoes on sheet with space in between the potatoes.
  5. Bake in oven for 20 to 25 minutes until golden brown.
  6. When potatoes are finished, keep them in the oven so they stay hot. Adjust temperature to 300°F.
  7. In a pan, coat bottom of pan with sugar. Add more sugar if you like foods more sweet.
  8. Wait for sugar to melt and caramelize, then add the potatoes.
  9. Toss the potatoes to coat it in the sugar and sprinkle it with sea salt. Serve.

Monday, November 15, 2010

A poem and some photos.

 This past week in my child development class, my professor read us this poem:

Once a little boy went to school.
He was quite a little boy
And it was quite a big school.
But when the little boy
Found that he could go to his room
By walking right in from the door outside
He was happy;
And the school did not seem
Quite so big anymore.

One morning
When the little boy had been in school awhile,
The teacher said:
"Today we are going to make a picture."

"Good!" thought the little boy.
He liked to make all kinds;
Lions and tigers,
Chickens and cows,
Trains and boats;
And he took out his box of crayons
And began to draw.

But the teacher said, "Wait!"
"It is not time to begin!"
And she waited until everyone looked ready.
"Now," said the teacher,
"We are going to make flowers."
"Good!" thought the little boy,
He liked to make beautiful ones
With his pink and orange and blue crayons.
But the teacher said "Wait!"
"And I will show you how."
And it was red, with a green stem.
"There," said the teacher,
"Now you may begin."

The little boy looked at his teacher’s flower
Then he looked at his own flower.
He liked his flower better than the teacher’s
But he did not say this.
He just turned his paper over,
And made a flower like the teacher’s.
It was red, with a green stem.

On another day
When the little boy had opened
The door from the outside all by himself,
The teacher said:
"Today we are going to make something with clay."
"Good!" thought the little boy;
He liked clay.
He could make all kinds of things with clay:
Snakes and snowmen,
Elephants and mice,
Cars and trucks
And he began to pull and pinch
His ball of clay.

But the teacher said, "Wait!"
"It is not time to begin!"
And she waited until everyone looked ready.
"Now," said the teacher,
"We are going to make a dish."
"Good!" thought the little boy,
He liked to make dishes.
And he began to make some
That were all shapes and sizes.

But the teacher said "Wait!"
"And I will show you how."
And she showed everyone how to make
One deep dish.
"There," said the teacher,
"Now you may begin."

The little boy looked at the teacher’s dish;
Then he looked at his own.
He liked his better than the teacher’s
But he did not say this.
He just rolled his clay into a big ball again
And made a dish like the teacher’s.
It was a deep dish.

And pretty soon
The little boy learned to wait,
And to watch
And to make things just like the teacher.
And pretty soon
He didn’t make things of his own anymore.

Then it happened
That the little boy and his family
Moved to another house,
In another city,
And the little boy
Had to go to another school.
This school was even bigger
Than the other one.
And there was no door from the outside
Into his room.
He had to go up some big steps
And walk down a long hall
To get to his room.
And the very first day
He was there,
The teacher said:
"Today we are going to make a picture."
"Good!" thought the little boy.
And he waited for the teacher
To tell what to do.
But the teacher didn’t say anything.
She just walked around the room.

When she came to the little boy
She asked, "Don’t you want to make a picture?"
"Yes," said the lttle boy.
"What are we going to make?"
"I don’t know until you make it," said the teacher.
"How shall I make it?" asked the little boy.
"Why, anyway you like," said the teacher.
"And any color?" asked the little boy.
"Any color," said the teacher.
"If everyone made the same picture,
And used the same colors,
How would I know who made what,
And which was which?"
"I don’t know," said the little boy.

And he began to make a red flower with a green stem.

This poem made me question how much of what I know and do was influenced by someone or something in the past. The scary part is that I don't even notice or realize the influence the objects or people had on me.

A lot of what I do in the kitchen is based on imitations of others and following recipes. I used to be so afraid of messing up and felt that I needed to follow the recipe in order to be good at baking that I rarely experimented in the kitchen. I have gotten over that fear and now have plenty of fun experimenting and "messing" up for the sake of improving and learning, which includes plating. I struggle with plating every time I make something. I have folders filled with pictures that show how much improvement I can use, but compared to my first photo, I'm a rock star now. Whooo!!

First picture I uploaded on my first post of my first food blog.
Cheese toast topped with onions and avocado ice cream
Potatoes sauteed with tomatoes and sausages. Garnished with homemade croutons.
Short ribs with rice and warm garlic butter beet salad.
Oven baked wings with quinoa and vegetables.

JSB's tilapia poached in mushroom stock. Garnished with Chinese chives and bamboo shoots.

Tuesday, November 2, 2010

I Run a Chinese Restaurant. (Homemade Pasta Recipe)

There are two ways that I come up with a post.

1) Inspiration randomly appears throughout my day.
2) I stare at my list of unposted photos and see which one calls out to me.

Today happens to be option #2 and the topic of the day is "my attempt at a nice meal while my parents were out with their friends." The menu was homemade pasta dressed in edamame sauce (it was a thickened up version of the soup) with katsu tilapia and roasted peppers. For dessert, fresh homemade caramel apples.

I hired my sisters to work again at my 'family run Chinese restaurant without pay.' JSB worked on the roasted peppers and she had so much fun playing with the fire. In the beginning, I was frightened by the flying pieces of burning pepper skin that floated up towards the vent. I did not want to explain to my parents why our house burned down while they were gone for a couple of hours. lol.

The alien life form after taking the roasted pepper apart.


I set my other sister, Kay, to work on the pasta. I had her kneading, rolling, and cutting pasta for a good 2 hours. Poor Child; she had to suffer before she was allowed to eat. ^.^

All purpose flour and semolina flour.

Mixing flours with fork.

Cracking egg over pasta.

The well with the egg.

Kneading.

Dough with a smooth and elastic consistency.

Rolling out the pasta. Yes, I don't own a rolling pin.

Pretty pasta, thanks to Kay =)

I had the very important job of making the caramel apples. I was surprised by how easy the task was and how quickly everything came together. The first couple of apples I dipped weren't attractive, but I definitely improved with the last few!

Honey Caramel Apples.
At one point, Grandma stopped by and I invited her to stay and eat with us. As usual, she refused and claimed that we didn't have enough food to feed her. Lies. We had plenty. The truth is that she thinks we are unhygienic cooks and thinks my sisters are incapable of cooking. When she came over, I was in the middle of photographing the apples and pasta and I managed to snap a photo of my Grandma smiling. Best part of the day. =)

Evidence that JSB and I are in dire need of help when it comes to plating. Originally I had a pile of noodles on one side and the slab of fish on the other side of the plate. JSB decided to dress it up with green onion and cherries. It ended up looking like a treasure map. >.>

Find the treasure!

Italian Pasta
From Ciao Chow Linda

Ingredients
  • 3/4 cup semolina flour
  • 3/4 cup all purpose flour
  • 2 large eggs

Directions
  1. Place flour on board and mix with a fork. Form a well. Add eggs in the center and whisk with fork until flour is slowly incorporated into mixture. (Add more flour if it's too sticky)
  2. Knead for 5 minutes until it is smooth.
  3. Allow the dough to rest for 30 to 45 minutes.
  4. Roll out and cut into desired shape.
  5. Boil for 2-3 minutes in salted water.

Thursday, October 28, 2010

N3rd Party. fail.

Wow. Hosting a dinner party was a new experience. Deciding on a theme, planning a menu, preparing and cooking the dishes, and breaking out the camera to take photos were all part of my checklist. Guess what? None of it went the way I planned. NONE!!

First, the theme was "Nerd" done gossip girl style. Sounds sexy cute, right? I had an outfit in mind to change into after I was done cooking and prepping all the food, but I never got to the change-into-outfit part. I was running around making sure everyone and everything was alright. Luckily, none of my buddies dressed up except for the one that came up with the theme. ahahah. ^.^

I didn't expect to have so much fun planning and organizing a menu. (Of course, I had 2 buddies helping me out).
The Menu
Melon & Prosciutto
Bread with spinach artichoke dip

Spinach Salad with pecans and cranberries
dressed with vinegar

Chicken Le Cordon Bleu with a mushroom cream sauce 
on top of pasta

Creme Brulee
Apple Crisp
Fruit Salad


I had the best time figuring out the ingredients and shopping. I always knew I enjoyed being organized, but I didn't expect to have so much fun doing it. I did make one change on the day of the dinner. The original appetizer was vienna sausages & pineapples. Gross. However, I managed to convince my friends to change it to melon with prosciutto with the help of JSB! yay!!! I nommed through the appetizers.

Originally, I wanted to do most of the shopping the night before, but my friends told me that it wasn't necessary and we could complete it the same day. I did an eyebrow twitch and they told me not to worry, but worry I did! It's a good thing I worried and purchased some ingredients on my own the night before. Dinner was suppose to start at 7, but we didn't get back to my house until 5:30 when we went shopping at 4 PM!! Talk about the stress I felt since I need organization and structure in my life in order to be at ease!!

(Anticipating chaos at night, I made my creme brulee and I prepped all the ingredients needed for my apple crisp before we went shopping. yay to thinking ahead!)

Oh gawd, prep work was when the nightmare began. First, our kitchen is tiny. Not a lot of workspace so only 2 people can prep at once. My buddy was in charge of the entree, but he was socializing so I ended up prepping for him. I had my sister making melon balls out of honey dew, cantaloupe, and watermelon. I had a family friend and my other sister making melon and prosciutto balls. After they completed the first task, I had them working on slicing bread and plating up everything. I seriously felt like I was running a Chinese "family" run restaurant outta my kitchen, meaning I slave them away with no pay. The only form of payment is food. lol.

I yelled at my friend to get his butt into the kitchen and get his dinner started, because it was nearly 7 and his chicken needed to be baked!! aiiiyaaaah. Paniiiic!! Of course, he is the type that thinks everyone runs on his time so he takes his time and tells me to relax. Another eyebrow twitch comes from me and I get started on the alcohol. I needed a drink.

All the appetizers and bread have been devoured and all the guests are hungry. Drinks are being made, jello shots are being passed around, and salad is served to hold off the hunger. Finally, food is served at 9:30 and as luck would have it there is NOT enough food for my buddies. Oyeee.

The worst part of the night was not being able to take photos of my creations. I was in the kitchen the whole night working on the food and cleaning up as we worked so I would have less to clean up later. The only photo I had was of my dinner and it is not a pretty photo either. ='(


What I have learned:
1) Buy all ingredients a night or two before the party.
2) Prep the majority of the ingredients the night before and in the morning.
3) Must have a dinner party again and see party 2.0 rock.
4) Finish cooking everything early so I can take photos!! =(
5) Theme? What theme? Forget about it, I want board game nights!!

Sunday, October 10, 2010

Crash Hot, What?


I've been writing so many essays recently that I haven't found the energy or inspiration to blog. I hate it. I miss having all the extra time to bake, take photos, and write about what happened. All I do now is bake, bake, bake, eat, eat, eat, sleep, sleep sleep, school, school, school, work, work, work, see the b/f, rinse and repeat. I've been so horrendous at writing that it took me 3 weeks to respond to my sweet dear friend that lives on the other side of the globe. Shameful.

Today, I leave you with a simple delicious potato recipe.


Crash Hot Potatoes
Inspired from The Pioneer Woman

Ingredients
  • Potatoes
  • Olive Oil
  • Sea Salt Salt To Taste
  • Black Pepper To Taste
  • Green Onion, chopped finely
  • Cheese
Instructions
  1. Bring a pot of salted water to a boil. Add in as many potatoes as you wish to make and cook them until they are fork-tender.
  2. On a sheet pan, line it with foil and place tender potatoes on the cookie sheet leaving plenty of room between each potato.
  3. With a potato masher, gently press down each potato until it slightly mashes, rotate the potato masher 90 degrees and mash again. Brush the tops of each crushed potato generously with olive oil.
  4. Sprinkle potatoes with sea salt and fresh ground black pepper.
  5. Bake in a 450 degree oven for 20 minutes. Add the cheese and green onion and bake for another 5 minutes or until the cheese starts to melt and crisp up.

Sunday, August 22, 2010

Being around food makes me happy

(Click photo to enlarge)

Lately I've been stressed worrying about my future. I currently work with children and I have a great time whenever I go to work. I laugh, I get irritated, and I love to see them smile and grow as a person. However, it's not something I can see myself doing for the rest of my life so where does that leave me? I've been researching about other careers where I can work with children, but the more information I find, the more confused and stressed I get. When that happens, I start reading food blogs and thinking about new dishes to make to destress myself. What does that mean? Does that mean my passion lies within food and not children? Or maybe the reason I enjoy being around food is because it's a hobby and not a job? So much to think about....

(Click photo to enlarge)

Pineapple-Banana Smoothie

Makes 3 cups

Ingredients
  • 3/4 cups fresh pineapples, frozen
  • 1 small banana, sliced and frozen
  • 6 oz plain yogurt (or any flavor)
  • 1/2 cup milk (or more)

Directions
  1. Add all ingredients into the blender and blend away until it's to your desired consistency.
  2. You may need to add more milk if the smoothie is too thick.

(Click photo to enlarge)

"Healthy" Deviled eggs

Serves 1

Ingredients
  • 2 hard-boiled eggs
  • smidge of Dijon mustard for flavor
  • 1 tsp green onion, finely sliced
  • 1 tsp Parmesan cheese

Directions
  1. Slice hard-boiled eggs in half.
  2. Keep 1 yolk and toss the other.
  3. Mix yolk with mustard, green onion, and Parmesan cheese.
  4. Fill the egg halves with filling and enjoy!

Sunday, August 15, 2010

Raspberry Banana Smoothie

Back in the day (wow...way to make myself sound old), my typical after school snacks included munching on crackers, slurping up instant cup of noodles, gobbling up cookies, and drinking milkshakes and juice. Talk about sugar, sodium, and fat overload.

Since I've started blogging, my need to consume junk food declined rapidly. I think it's changed because it's much more fun to photograph homemade fresh foods than packaged foods. The best part about creating my own dishes is hearing my family telling me that they enjoyed with I made. And if they did not enjoy it, it motivates me to try again and again until they give me the seal of approval.

 (Click image to enlarge)

Raspberry Banana Smoothie

Serves 2

Ingredients
  • 1 cup banana, frozen
  • 3/4 cup raspberries, frozen
  • 1/2 cup milk (or more depending on the consistency)

Directions
  1. Toss everything in the blender and blend away until its to your desired consistency.
  2. You may need to add more milk to the smoothie if you find it too thick.

 (Click image to enlarge)

Wednesday, August 11, 2010

Tomato Sauce and Oven-baked Wings (recipes)

I had a wonderful vacation this past week. It was relaxing and I got to spend quality time with my man. There was only one problem. I started getting cranky near the end of our trip. I was ingesting too much grease in my system and not enough fresh vegetables. It only took a vacation to remind me how much I love to cook my own food.


Basic Tomato Sauce
Recipe from The Amateur Gourmet
(the recipe below was taken from his book, but his website has a similar one)

Makes 4 Cups

Ingredients
  • 1/4 cup extra virgin olive oil
  • 1 Spanish Onion (substitute: yellow onion), finely diced
  • 4 garlic gloves, peeled and thinly sliced
  • 3 TBSP chopped fresh thyme (or 1 TBSP dried thyme)
  • 1/2 medium carrot, finely shredded
  • 2 28-oz cans peeled whole tomatoes
  • kosher salt

Directions
  1. In a 3-quart sauce pan, heat olive oil over medium heat. Add onion and garlic and cook until soft and light golden brown (8-10 minutes).
  2. Add thyme and carrots and cook for 5 minutes or more until carrots are soft.
  3. With your hands, crush tomatoes and add them with their juices into the saucepan.
  4. Bring to a boil, stir often, and lower heat. Simmer for 30 minutes or until sauce is thick as hot cereal.
  5. Season with salt. Serve.

Notes:
  • Keeps for 1 week in fridge or 6 months in freezer.
  • I found the sauce a tad too salty for me, because of the sodium in the canned tomatoes. Next time, I may attempt to cook this sauce with super ripe fresh tomatoes to cut back on the salt.

Oven-Baked Chicken Wings

Serves as many as you want.

Ingredients
  • Chicken wings
  • Black pepper
  • Salt
  • Garlic Powder
  • Olive Oil

Directions
  1. Rinse the wings and dry with a paper towel. Lay them out on a baking sheet.
  2. Preheat oven to 400°F.
  3. Drizzle the wings in olive oil and make sure the wings are evenly covered in the oil. Liberally cover the wings in black pepper and garlic powder. Add a dash of salt on each wing and rub the salt into the wing (a wing massage if you will.).
  4. Line cooking sheet/baking sheet in foil and lay the wings on it. Make sure to give ample space between each wing (about 1 inch of space).
  5. Bake in oven for 40 to 45 minutes or until the skin is golden brown.

Thursday, July 15, 2010

Fake Corn Soup and Failed Apple Tarte Tartin

I love punking around with JSB. After my success with Mini-snack #1, she was excited for another surprised. I knew she was waiting for a gourmet snack in a larger portion. No way was I going to sit back and just let her freeload off of me.

I made corn soup and topped it with salmon and basil. She came home excited and devoured the snack and told me it was really good, but questioned where I got the corn from.


I told her the secret was canned corn. She gave me the "You-fed-me-what?" look and I had my ROFL moment.

Sadly, karma exists in this world. After I fed JSB the corn soup, my attempt at cooking an Apple Tarte Tartin failed miserably.


Instead of an impressive tartin, I ended up with a burnt mess.

Monday, July 5, 2010

Waaah! Sliiiiiime!! (Edamame Soup)

I randomly stumbled upon White on Rice couple's edamame soup. I didn't think much of it until I read the recipe and realized how simple it was. All it required was a bit of sauteing, add the edamame and stock, simmer a bit, and blend it up. BAM! and you got yourself a soup.

My only mistake was using canned chicken stock, because it was too salty. If I had the choice, I would use homemade stock -- much healthier too.


Side note: my soup was on the thick side so I made pasta to go with it, which JSB devoured and complained that I gave her too little.

Edamame (Soy Bean) Soup
Recipe from White on Rice Couple

Ingredients
For vegetarians, use vegetable stock. For everyone else, use bacon and stock.
  • 1 T Butter
  • 1 t Sesame Oil
  • 2 T Shallots, finely minced
  • 1/2 T Garlic (2 cloves), crushed
  • 1 1/2 T Ginger (2″ knob), finely grated or crushed
  • optional- 2 pieces Bacon, diced
  • 1 pkg Soy Beans (16oz)
  • 3 c Chicken or Vegetable Broth (add more for a lighter, more liquidy soup)
  • 1 1/2 T Soy Sauce
  • fresh cracked pepper and thinly sliced green onion for finish & garnish


Directions
  1. On medium heat, melt butter with sesame oil in a sauce pan. (If using bacon, omit the butter and fry the bacon and sesame oil till the fat is rendered) Add shallots, garlic and ginger. Sauté until lightly golden and fragrant.
  2. Add soy beans, broth and soy sauce.  Cover and simmer for 20 minutes or until soy beans are tender (how fast or slow you simmer will affect the thickness of the soup. It is always a good idea to have extra broth in case you boil off too much liquid.)
  3. Put everything into a blender and puree until smooth. Return to sauce pan to keep warm.  Serve with fresh cracked pepper on top of each bowl and the thinly sliced green onion. Add a light stream of sesame oil or a  touch of sour cream or creme fraiche for extra tastiness.
  4. If the soup is too thick for you, add more broth until it reaches your desired consistency.

Thursday, June 3, 2010

Oh em Gee, the best way to use up lemons! (Lemon Bar recipe)

Mom: "Piee, look at these lemons I bought!"
Me: "Hrmm?..."
Mom: "They were sooo cuuuute. Bright yellow and tiny with thin skins, and heavy too!"
Me: "Oh...they look nice...I guess I could use them to make something."
Mom: "NO! You may not."
Me: "Eeeh??" O.o
Mom: "You will make me FAT!"

Because I'm such an obedient daughter, I didn't touch the lemons for a week. No one else touched them either. I guess no one wanted lemonade. The lemons started wrinkling and the color began to dull. Since the lemons were deteriorating, I took it as a sign that the lemons needed to get used and abused. In other words, It's time to make Mom fat.

I decided to make lemon bars, because I adore the tangy, sweet, and lemony flavored filling on a nice shortbread crust. Coincidentally, I managed to use up all the lemons for this recipe too. yay. no leftovers!


I chose to halve the lemon filling, because in the pictures, it looked like there was a crapton of filling to crust ratio. I prefer a 1:1 ratio of crust to filling. I decided to do some research and found another recipe that I could use. I ended up combining 2 recipes to suit my taste, however, I borrowed more from Food Gal's recipe.


Lemon Bars
Adapted from Foodgal and Oishi Food

Ingredients
Crust
  • 3/4 cups of flour
  • 1/4 cup powdered sugar
  • 6 TBSP of butter
  • Dash of salt

Filling
  • 3 eggs
  • 1 1/4 cups of sugar
  • 1/2 cup + 2 TBSP of lemon juice
  • 1/3 cup of all-purpose flour

Directions
For the Crust:
  1. Preheat oven to 325°F.
  2. Combine flour and sugar in a bowl and beat until mixed. Add butter until the size of small peas. Press into a 9 inch pie pan.
  3. Bake until crust is golden brown, approximately 20 to 25 minutes. Allow crust to cool to room temperature. Reduce oven temperature to 300°F.
For the filling:
  1. Whisk eggs and sugar until smooth. Add lemon and flour. Pour onto crust.
  2. Bake until filling sets, approximately 40 minutes. Allow the bars to cool to room temperature and store in fridge for a 1 hour before serving.
  3. Store in fridge for up to 3 days.

Thursday, May 27, 2010

Om Nom Nom Delicious White Chocolate Macadamia Nut Cookies

I love experimenting, but sometimes I wish I didn’t. The problem is that I have fallen in love with my dad’s DSLR. I was experimenting to see how much of an effect it would have on my food photography. Wow. I could take a nice overview shot and still see the texture of my goodies. With my point-and-shoot, I had to get up close and personal before I could photograph the texture of my food, which often resulted in tight compositions.

(Click Picture to Enlarge)

You see my dilemma? I can’t go back to point-and-shoots anymore! I try to convince myself that I still need my point-and-shoot because it’s a good way to practice my composition skills...but the quality isn't the same. ='(

On a side note, these cookies were delicious. Chewy and moist with the crunch from the nuts. Mmmm…and the creaminess of the white chocolate melting in your mouth. Best combination e-var. My only issue with the recipe was that I found it too sweet so I reduced the sugar amount in the recipe below.

(Click Picture to Enlarge)

White chocolate Macadamia Nut Cookies
Adapted from For the love of cooking

Ingredients
  • 2 cups all-purpose flour
  • 1/2 tsp baking soda
  • 1/2 tsp salt
  • 3/4 cup butter, melted
  • 3/4 cup brown sugar
  • 1/4 cup white sugar
  • 1 egg
  • 1 egg yolk
  • 1 TBSP vanilla extract
  • 1 1/2 cups macadamia nuts, roughly chopped
  • 2 4oz. white chocolate bar cut into chunks (approx. 1 3/4 cups)

Directions
  1. Preheat oven to 325°F.
  2. Combine flour, baking soda, and salt in a small bowl.
  3. In another bowl, beat together melted butter, brown sugar, white sugar, egg, egg yolk, and vanilla until creamy.
  4. Gradually add the flour mixture to the sugar mixture until just mixed.
  5. Stir in nuts and white chocolate.
  6. Drop by the spoonful onto baking sheet.
  7. Bake for 12 to 15 minutes until edges look golden brown.
  8. Cool on baking sheet for at least 4 - 5 minutes so the cookies can set before moving to a rack.

Saturday, May 22, 2010

Oven-Baked Fries (Potato or Taro)

(Click Picture to Enlarge)

Whenever I hear someone order a salad or diet soda along with their fries, big mac, or any high calorie fast food item, I die a bit on the inside. Psychologically, it makes you feel better, because you think, "Oh, I got my a side salad. That's healthy. Or I got diet soda, which is so much better than regular soda." But if you press the pause button and think rationally, the healthy side salad or diet soda doesn't cancel out the rest of your greasy meal. You are still eating overly processed goodies that lack nutrients.

Sadly, I am a victim of that sort of logic. When I have a craving for junk food, I try to satisfy it with a healthier alternative. This time I was dying for the crunch of crispy McDonald fries, but all we had at home were baby taros. I had the brilliant idea to oven-baked them, because it would be "healthier" and to eat a crapton of veggies with it. Oh, and a glass of milk.

(Click Picture to Enlarge)

I did learn one thing about baby taros. They aren't meant for baking, but I'm sure with the larger taro, it would work well for oven-baked fries. The problem with baby taros is that it becomes very mushy and soft after it's cooked compared to the larger variety that's still firm after it's cooked.

(Click Picture to Enlarge)

Oven-Baked Fries (Potato or Taro)
*this is a very flexible recipe.*

Ingredients
  • potatoes or big taro
  • salt, to taste
  • pepper, to taste
  • olive oil

Directions
  1. Preheat oven to 425°F.
  2. Wash, peel, and cut the potatoes (taro) into thin strips.
  3. Toss the potatoes (taro) with salt, pepper, and drizzle with olive oil. You want to lightly coat the potato/taro in olive oil. DO NOT drown it.
  4. Spread one layer of potatoes/taro onto a baking sheet. I lined it with foil so it would be easy clean up. Make sure there's space between each piece.
  5. Bake in oven for 25 to 30 minutes or until browned and tender.
(Click Picture to Enlarge)

Saturday, May 15, 2010

Super healthy delicious Chocolate Chip Banana Cake

Last year around my birthday, I made my own birthday cake. The cake was moist, sweet, healthy, and delicious and my family devoured it. However, they had one complaint: it was a bit too moist. As in, it was so moist that it was on the borderline of wet/mushy so I made a note in my notebook to make it firmer the next time I tried again.

Coincidentally, we ended up having too many ripe bananas around my birthday again this year. I pulled out the old recipe and made some adjustments.


The verdict: it was a major improvement from last time. It was so good that my grandma requested that I make more for her and said I was the best baker ever. Muahahah. I love my g-ma.

Chocolate Chip Banana Cake
Adapted from Pink Peppercorn

Ingredients
  • 3 TBSP butter
  • A heaping 1/4 cup of granulated sugar
  • 2 TBSP applesauce
  • 1 tsp cinnamon
  • 1 egg
  • A dash of milk
  • 2 1/2 bananas, mashed
  • 1 tsp vanilla
  • 3/4 cup of wheat flour
  • a little less than 1/4 cup of wheat germ
  • a little less than 1/4 cup of flax seed
  • a heaping 1/2 cup of rolled oats
  • 1 tsp of baking soda
  • 1/4 tsp of salt
  • 1/2 cup of semi-sweet chocolate chips
  • 1/2 cup of walnuts, coarsely chopped
  • 1/3 cup of walnuts, chopped, (this is used as topping)

Directions
  1. Preheat oven to 350°F.
  2. Cream butter and sugar together. Add applesauce, cinnamon, and egg to mixture. Mix well.
  3. Stir in milk, bananas, and vanilla. Combine.
  4. Add in the rest of the ingredients: flour, wheat germ, flax seed, rolled oats, baking soda, and salt. Mix.
  5. Gently combine the chocolate chips and walnuts with the rest of ingredients.
  6. Pour the mixture into an 8x8 inch dish lined with parchment paper.
  7. Sprinkle the crushed walnuts (1/3 cup) on top.
  8. Bake for approximately 30 minutes or poke the cake with a toothpick and see if it comes out clean.

Monday, May 10, 2010

A-Maizing Corn Snacks. NOT!

It's been a busy morning and I'm feeling grumpy, tired, and hungry. I need a mood picker upper before I meet up my friend. I enter a store and wander through the aisles to the snack section. I select a package that reminds me of "corn nuts" because it says its a corn kernel snack.I pay for the package and walk to the bus stop.


My bad mood makes a turn for worse. My corn nuts-esque snack turned into what looked like half-popped kernels from a popcorn factory. What a disappointment.  I was not expecting leftovers to be repackaged and sold. *sad face*


It tasted salty and I wasn't a fan of the texture. However, JSB loved it, because her favorite part about popcorn are the semi-popped kernels.

Bottom line: Avoid product unless you enjoy semi-popped corn kernels.

Sunday, April 25, 2010

Mmm...Cinnamon Gluteus maximus (aka Cinnamon buns/rolls)

I am one of those bakers that enjoy creating tasty treats, but do not gorge on what I create. For me, the process of creating and presenting the final product is my favorite part out of the cycle. I have very little desire to eat what I make. As a result, I often need to find victims...err lovely friends to give my goodies to.

Cinnamon Rolls with cream cheese icing.

Cinnamon rolls was on my "to-make-and-give-away" list. I wanted to make small 3 to 5 bites sized rolls instead of the ginormous regular-sized buns so it would be less of a sugar overload. Because my family dislikes fat-filled diabetic causing goodies, I was forced to wait...and wait...and wait some more...until...

Some sucker requested me to make cinnamon buns. It all started, because I was teasing one of JSB's friends. She was telling me how her friend has been making banana muffins for weeks, because he always had ripe bananas at home. I told her to tell her friend to make some with cream cheese filling, because I've been craving for some banana muffins stuffed with cream cheese. Like everything else in life, nothing is free. He was reluctant to bake me muffins until I offered to make him anything in return. He excitedly choose cinnamon buns in <3 shaped. yeah....Cute, but I can't be caught flirting with high schoolers by making heart-shaped buns and sending wrong messages to teenagers. Yeesh, I'm gonna get my ass sent to jail.

After much thought, I settled on a recipe by Paula Deen. I planned on making smaller buns (approx 3 inches in diameter), which yielded about 30 rolls. I decided to make 2 toppings: sugar glaze and cream cheese icing.

 Icing the buns.

Because cinnamon buns taste the best fresh out of the oven, I made the important decision to bake it in the morning for JSB to bring it to school. I made her three trays (1 cream-cheese icing and 2 sugar glazed).
Before cutting the rolls.

In order for me to have enough time in the morning to bake it, I made the dough the night before and shoved the dough in the fridge overnight.

Pre-rising.

After rising.

I woke up at 5:30 AM in the dark the next day to preheat the oven and to bring the dough to room temperature.

Fresh out of the oven.

While the buns were baking, I made the icing. As soon as JSB was ready to leave the house, I gave her three trays in a bag for her to bring to school and share with her friends.

Sugar glazed.

The verdict: her friends thought the buns were good, but not enough sugar (aka icing). Because pastry drenched in sugar puts me off, I intentionally lightly drizzled the icing on the buns. However, I forgot that highschoolers adore sugar and fat overkill. The high schoolers loved the sugar glazed rolls, but JSB and I preferred the cream cheese frosting.

Cinnamon bun side-view.

Cinnamon Rolls
Recipe from Paula Deen

Ingredients:

Dough
1/4 oz package yast
1/2 cup warm water at 110 degrees Fahreinheit
1/2 cup milk at 110 degrees Fahreinheit
1/4 cup sugar
1/3 cup better, melted
1 tsp salt
1 egg
3 1/2 to 4 cups flour

Filling 
(I felt her filling was a bit excessive so I lowered the amount of butter and sugar)
3 tbsp butter, melted
1/2 to 3/4 cup brown sugar
1 1/2 tbsp cinnamon (I used Saigon cinnamon)

Directions:
  1. Heat oven to 350 degrees F.
  2. In a small bowl, dissolve yeast in warm water and set aside. In a large bowl mix milk, sugar, melted butter, salt and egg. Add 2 cups of flour and mix until smooth. Add yeast mixture. Mix in remaining flour until dough is easy to handle. Knead dough on lightly floured surface for 5 to 10 minutes. Place in well-greased bowl, cover and let rise until doubled in size, usually 1 to 1 1/2 hours.
  3. When doubled in size, punch down dough. Roll out on a floured surface into a 15 by 9-inch rectangle. Spread melted butter all over dough. Mix sugar and cinnamon and sprinkle over buttered dough. Sprinkle with walnuts, pecans, or raisins if desired. Beginning at the 15-inch side, role up dough and pinch edge together to seal. Cut into 12 to 15 slices.
  4. Coat the bottom of baking pan with butter and sprinkle with sugar. Place cinnamon roll slices close together in the pan and let rise until dough is doubled, about 45 minutes. Bake for about 30 minutes or until nicely browned.
  5. Meanwhile, mix butter, powdered sugar, and vanilla. Add hot water 1 tablespoon at a time until the glaze reaches desired consistency. Spread over slightly cooled rolls.

Sugar Glaze
Adapted from Paula Deen

Ingredients:
1 tbsp butter
1/2 cup sugar
1/4 tsp vanilla
1 1/2 tbsp hot water

Directions:
  1. Mix butter, sugar, and vanilla.
  2. Add water until glaze reaches desired consistency.
Sugar glazed bun.

Cream Cheese Icing
Adapted from Alton Brown

Ingredients:
1 1/4 oz cream cheese, softened
1 1/2 tbsp milk
3/4 cup powdered sugar

Directions:
  1. Whisk cream cheese until creamy.
  2. Add milk until combined.
  3. Sift in powdered sugar and mix until smooth.
Cream cheese icing.

LinkWithin

Related Posts with Thumbnails