Monday, December 26, 2011

Appreciation [Boston Cream Pie]

Appreciation is showing that we care and value someone. As a teacher, working with kids bring joy when they accomplish a milestone. At a preschool level, I work with not just the children, but also their parents. It's a packaged deal and sometimes we have different opinions about discipline methods and expectations. It's my job to help the parents understand that what we do is intended to help children learn and grow. When we bump heads, I fear that I may have stepped on their toes too much so when the holidays roll around and parents go out of their way to purchase gifts of appreciation, it makes me so happy, because I know that what I do is of value to them.

The Christmas much like Thanksgiving is about showing those around you that you care about them. I brought this cake to dinner and it was a hit at Thanksgiving. All I can say, is Thank You Joy of Baking! You're magical. I made a large 9-inch cake for the dinner, but for photography purposes a mini one was made.


The components are easy to put together. The pastry cream can be made the night before, the cake in the morning, and assembled a couple hours later after the cake cools.

Saturday, December 24, 2011

Holidays, Whoo!

Wow. The year has certainly passed by quick. I've been so busy that I didn't realize it's nearly a new year and I have to pack! I'll be going on vacation, but I have scheduled a post to appear on Monday to keep you company!

Happy Holidays and Have a wonderful New Year! See you in 2012!

Wednesday, December 14, 2011

Delicious, but Ugly Series #2 - [Cheese Pancakes]

I like simple and quick when I'm craving for a snack. Ever since I discovered Vanilla Garlic and his damn posts about delicious cheese he consumes, I've been craving cheese. I specifically wanted crispy melted cheese and these pancakes satisfied my craving.

Aiiiyaaah. Overexposed image. [insert sad face]

Cheese Pancakes
adapted from Use Real Butter

Note: This is based on Use Real Butter's green onion dough and instructions. The best part, no measurements are needed and you can health it up with whole wheat flour.

Ingredients
1:1 ratio of whole wheat to all-purpose flour (or only all-purpose flour)
water
sea salt
pepper
grated cheese (Mozzarella, Cheddar, or Parmesan. Or a mix of the three)
crushed garlic (I used a garlic press)

Directions
  1. Put desired amount of flour in a bowl. For one, I use about 1/2 cup of flour. Start with 2 tablespoons of water. Mix and if it's still too dry. Add more water by teaspoons and continue mixing. If too much water is added, simply mix in a bit of flour. It's the right consistency when the dough is slightly sticky to the touch. Knead for 5 to 10 minutes until is soft and smooth. Let it rest for 20 minutes.
  2. Take 1 1/2 to 2 inches ball of dough and roll out as thin as you can. Sprinkle a bit of garlic evenly on top. Then add salt, pepper, and cheese evenly on surface as well.  Leave about 1/2 inch of untouched dough along the edge. 
  3. Start from the bottom and roll upwards so it forms a long cylinder. Start with one end and roll inwards so it starts looking like snail or cinnamon roll. Press down with the palm of your hands so it flattens the snail. Roll the dough as thin as you can. This is important, because if it's too thick you'll get burnt cheese and raw dough.
  4. Sprinkle cheese on top and press into the dough with palms of your hand. (Scroll to bottom to see visually what I'm referring to)
  5. Heat skillet over low heat. It's ready when water is sprinkled and immediately sizzles. Don't add oil to the skillet. Once the pancake is added to the pan, the cheese will release enough oil to prevent it from sticking. Place a  pancake in skillet, you know it's ready to flip when the cheese on top begins to melt. Flip pancake. Wait 40 seconds  and check to see if the bottom is nicely browned. 
  6. You're done. Serve with apple slices. A different form of cheese and crackers!

Step #4 Sprinkling cheese and pressing into pancake

Thursday, December 1, 2011

Dessert for Two #2 - [Caramel Coffee Panna Cotta]


Sometimes when I'm taking the bus or waiting for someone, I start brainstorming. Flavors, cakes, cookies, and other elements explode and collide into beautiful colors. Once in awhile, a brightness will outshine all the other fireworks going off and I know it's the one to test out in the kitchen.

This is one of those ideas. In highschool, Starbuck's Caramel Frappuccino was the "thing" to spend my allowance on. At least two days a week, I would purchase a tall frappuccino and enjoy the sweet combination of caramel, whipped cream, and caffeine. After awhile, I grew out of it. It stopped tasting as wonderful and it started to taste one dimensional. It lost its "wow" factor.


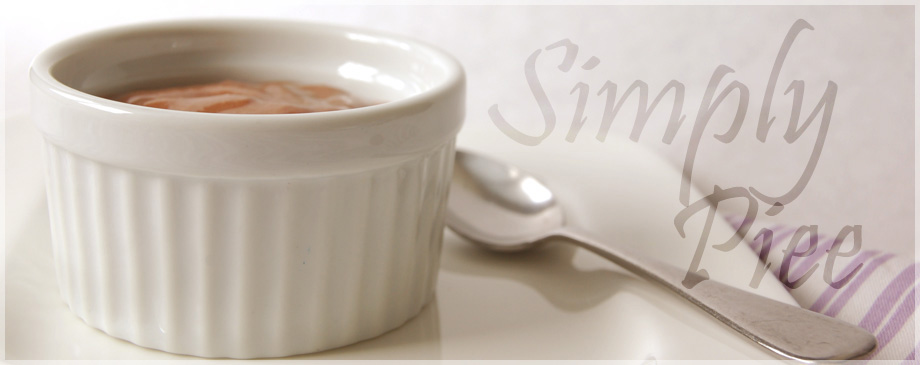
With a carton of heavy cream and milk sitting in the fridge, I thought a coffee panna cotta sounded perfect, but what if I elevated it by adding caramel. It's the sophisticated version of Starbuck's Caramel Frappuccino in dessert form.


Caramel Coffee Panna Cotta
adapted from Giada De Laurentiis

Note: For extra Starbuck's awesomeness, garnish with caramel sauce and whipped cream. =)

Serves 2 to 4
(depending on the size of your glasses)

Ingredients
1/2 cup whole milk
3/4 tsp unflavored powdered gelatin
1/2 cup heavy cream
2 TBSP sugar
1/8 tsp salt
1 heaping tsp instant coffee powder

Directions
  1. In a bowl, sprinkle gelatin over milk. Let it soften while making caramel.
  2. Microwave heavy cream for 30 to 45 seconds until warm to the touch. Set aside.
  3. Sprinkle sugar in a pot over medium low heat. When the sugar starts liquefying, turn the heat to low. As the sugar turns into a dark amber, remove from heat and let it turn into a dark chestnut brown. If the colors stops, return to stove top over low heat. When the desired color is achieved, add warmed heavy cream and salt. If lumps form, dissolve over low heat.
  4. When caramel is smooth, add whole milk and coffee powder. Keep the heat on low and allow the mixture to warm up. When the gelatin dissolves, remove from heat. Whatever you do, do not let the mixture boil.
  5. In a heatproof bowl, put a strainer on top and pour the mixture. Let the mixture come to room temperature or put it in the refrigerator for 20 to 25 minutes.
  6. Once the mixture cools, give it a good stir and divide it into glasses of your choice. (I have used shot glasses, martini glasses, and ramekins).
  7. Let it firm up in the refrigerator for at least 4 hours. Garnish with shaved chocolate or fresh whipped cream and caramel sauce.

LinkWithin

Related Posts with Thumbnails